Learning AWS Day by Day — Day 7 — Elastic Block Storage (EBS) Multi Attach & Snapshots, Mounting Unmounting EBS


Exploring AWS !!
Day 7:
Elastic Block Storage (EBS) Multi Attach & Snapshots, Mounting Unmounting EBS:
Amazon EBS Multi-Attach — available on provisioned IOPS IO1 volume. We can now multi-attach on Amazon EBS provisioned IOPS io1 volume to allow a single volume to be concurrently attached to up-to 16 AWS Az Nitro system based Amazon EC2 instances within same AZ.
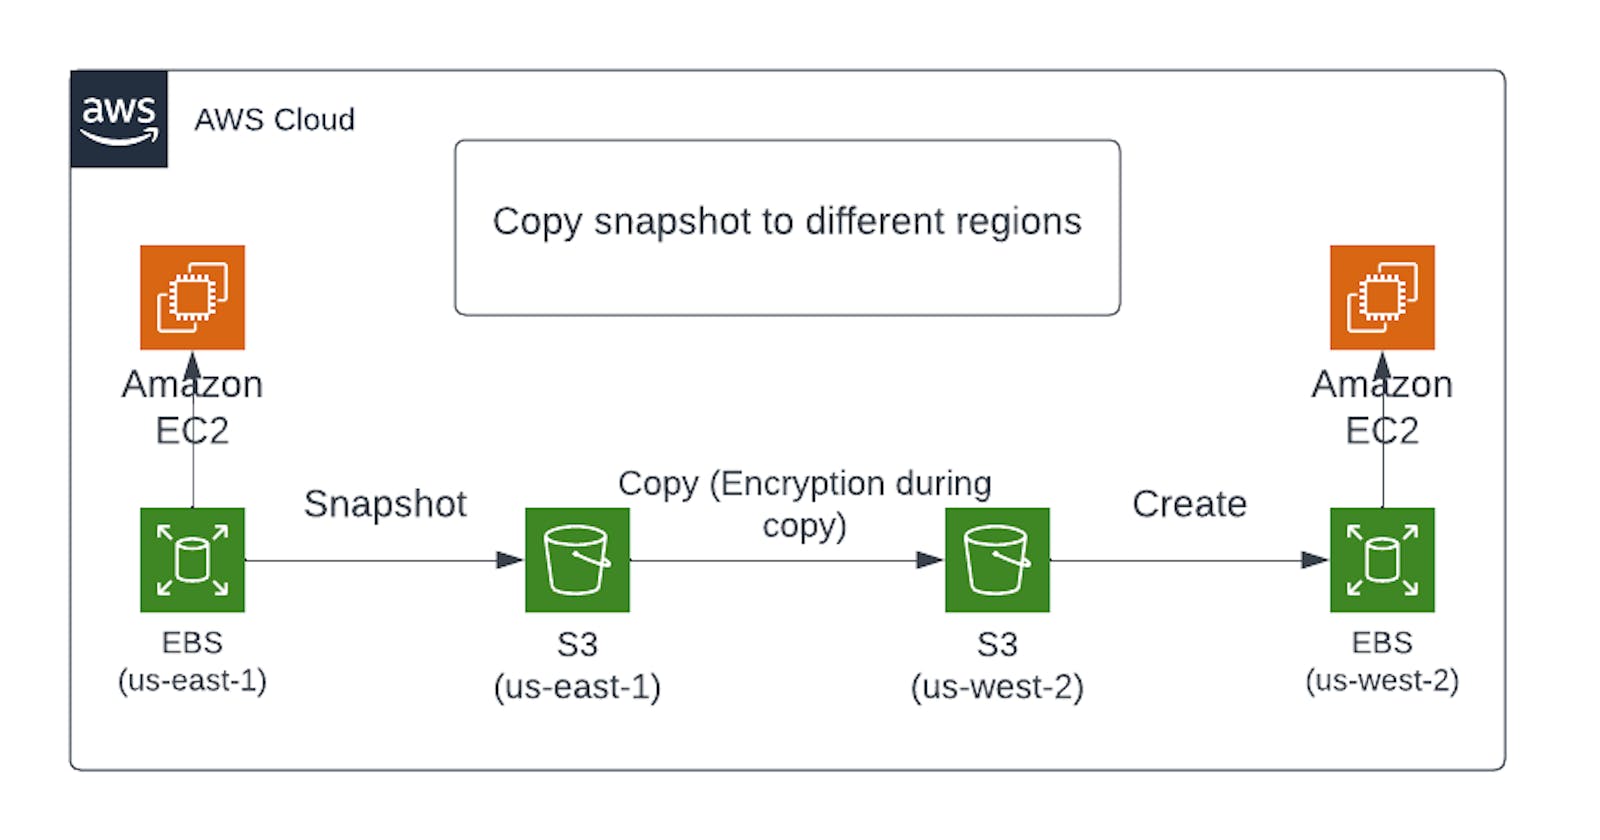
EBS Snapshots:
Snapshots are used for taking backups on EBS volumes. All snapshots are incremental backups except for 1st one. Snapshots are copied to Amazon S3.
Data Lifecycle Manager for Snapshots:
Amazon DLM supports Amazon EBS volumes and snaps.
We can define backup and retention schedules for EBS snapshots by creating lifecycle policies based on tags. It is free. No need to create custom scripts.
Automating snapshot cycle helps with:
Protecting valuable data by enforcing regular backup schedule.
Retaining backup as required by auditors or internal compliance.
Reducing storage costs by deleting outdated backup.
Quotas for AWS DLM:
Can create up-to 100 lifecycle policies per region.
Can add up-to 45 tags per resource.
Can create one schedule per lifecycle.
EBS Encryption:
Supported by all volume types but not all instance types.
Unencrypted to encrypted.
Encrypted to unencrypted.
Creating and mounting an EBS volume:
- Creating EBS volume:
1. Choose EBS under volumes on EC2 dashboard.
2. Click on Create Volume.
3. Reduce size to 8 GB, choose AZ same as instance.
4. Create Volume → Click Actions → Attach volume.
5. Click instance field → available instance → proceed to create.
- Mounting EBS volume onto instance:
Reconnect your Ubuntu instance (discussed in previous posts) and follow the commands below one by one to mount created EBS volume on it.
\>> lsblk (to get device name)
\>> sudo mkfs -t ext4 <device-name>
\>> sudo mount <device-name> <file-system-name>
\>> sudo file -s <device-name> (to get file system type)
EBS Volume commands:
lsblk
file -s /dev/devicename
mkfs -t ext4/dev/devicename
mkdir ebsvolume
mount /dev/devicename path/to/ebsvolume
df -h
umount /dev/devicename
resize2fs
— lsblk — all mounted filesystems
— sudo su
— file -s /dev/xvdf (no format-data)
— file -s /dev/xvda (format-DOS/MBR)
— mkfs -t ext4 /dev/xvdf (created file system)(mkfs is for making file system)
— mkdir ebsvolume
— mount /dev/xvdf ebsvolume
— lsblk (now you can see its mounted)
— cd ebsvolume
— nano abc.txt (adding a txt file to the volume)
For unmounting the volume:
umount /dev/xvdf (files deleted, if again mounted then files will be back)
Either resize from Actions tab OR df -h (shows actual size)
resize2fs /dev/xvdf (will bring to actual one we entered)
Taking backup of EBS Volume:
Create Snapshot → tag → name → Create
Force detach volume → deleted (now we will create volume using snapshot)
For multi-attach → Select type → Provisioned IOPS → check box multi attach (only have to attach to Nitro based instances.)