

Exploring AWS !!
1. Select Application Load Balancer.
2. Choose all regions.
3. Select Target Group and give a name.
4. Select the instance.
5. Click Create.
6. Open targets and click on target.
7. Go to target tab and Register.
8. Select one and register then it’s created.
9. Copy DNS.
10. To connect another Target group, go to Target group section.
11. Create Target and select instance.
12. Select Target group name, click Next.
13. To attach the target to load balancer, go to load balancer.
14. Click on listeners, click View and Edit rule.
15. Go to edit, click Edit icon and Delete previous one.
16. Forward to application target and give 8.
17. Click application target and give 2.
18. Click on the Tick Mark.
19. Click Update.
20. The Load balancer is created.
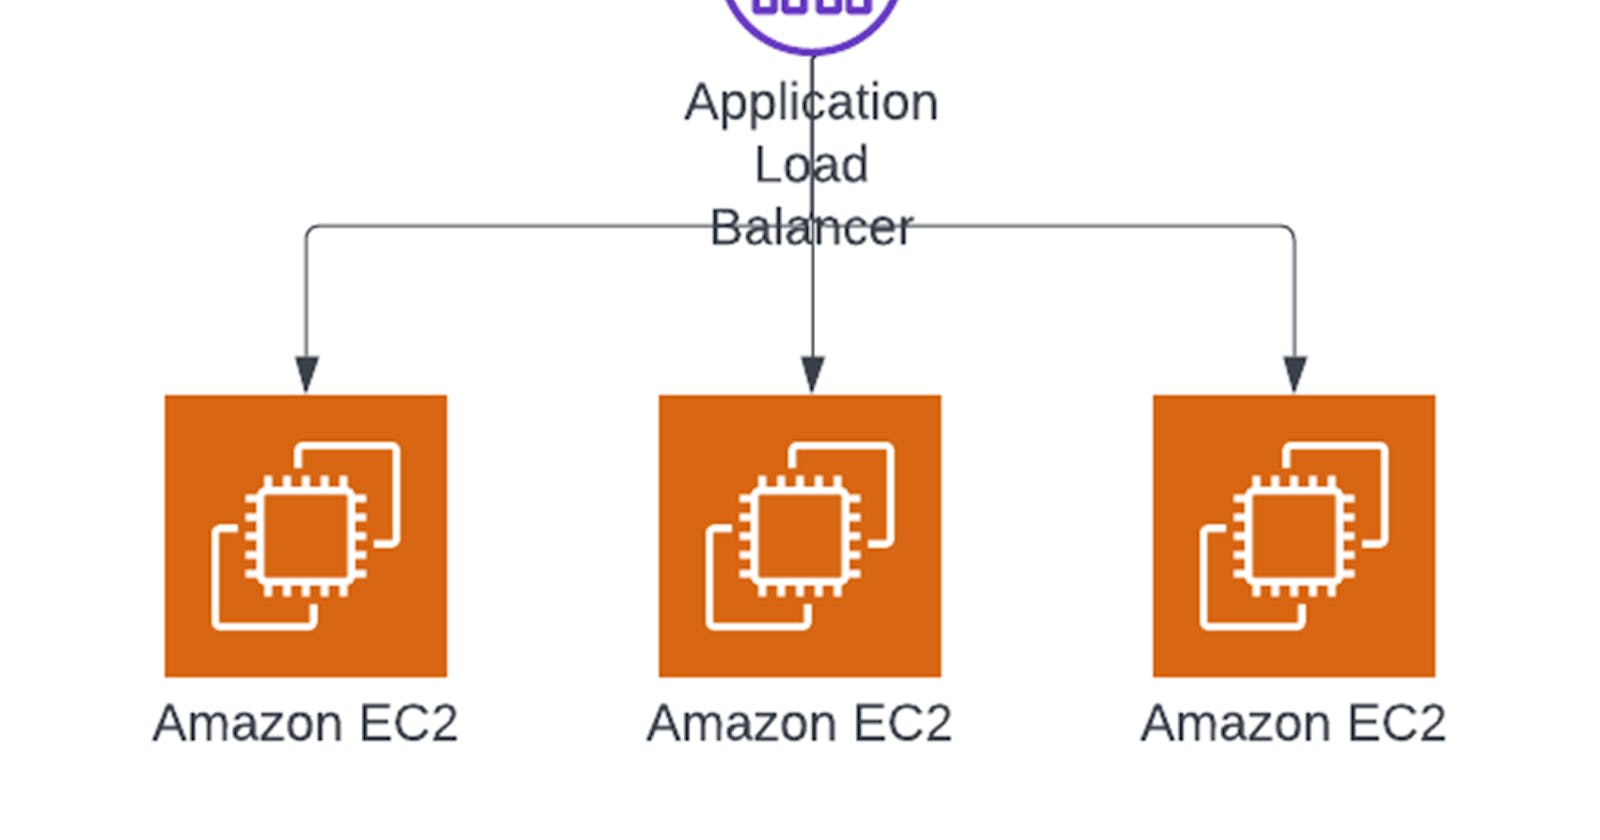
Go through the below steps and try creating different Load Balancers in EC2, these are the real world scenarios mentioned. The steps below can help you understand a lot and give you a good hands-on with Load Balancers.
1. Create 3 EC2 instances using Ubuntu Server AMI

Choosing AMI
2. Check once the 3 instances are launched.
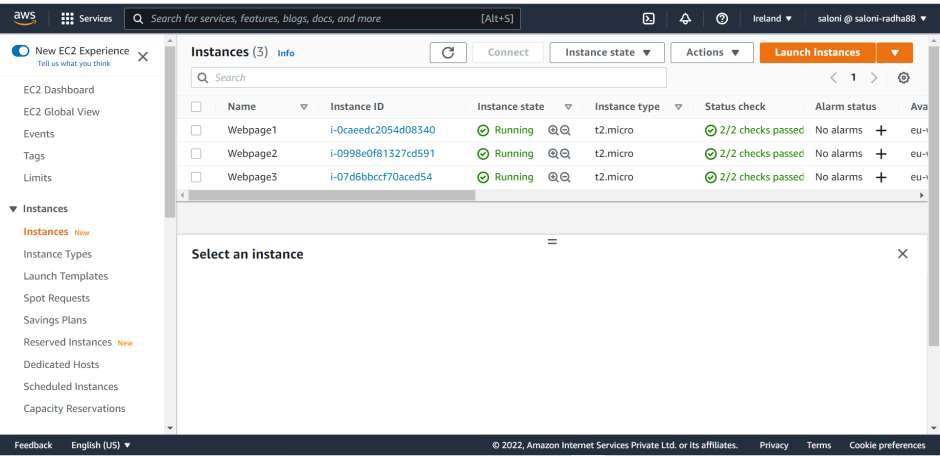
Checking launched instances.
3. Connect the first instance via Instance connect and install apache2 and edit the apache2 Welcome page by replacing it with the desired web page

Install apache
4. Once the new page is created, launch the same using Public IPv4 address to check if it’s working
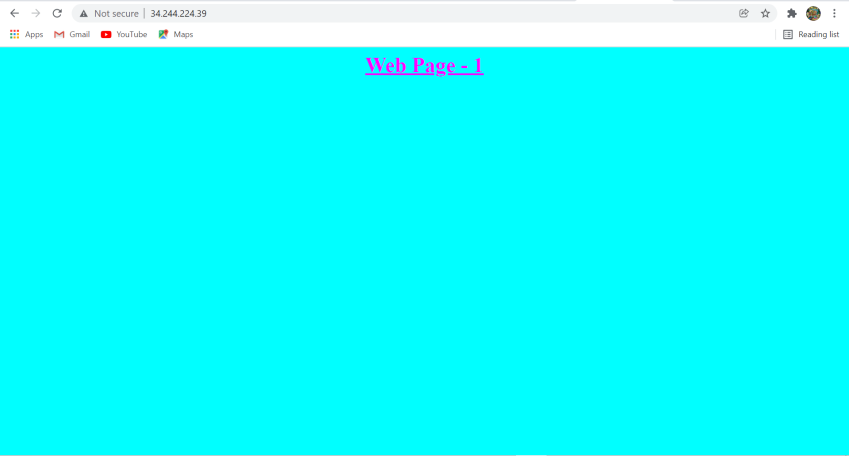
Checking Web Page -1
5. Similarly connect via second instance and third one too, and replace the file index.html with the desired web page

6. Our second page will look like the one shown below

Checking second page
7. The below will be the third webpage

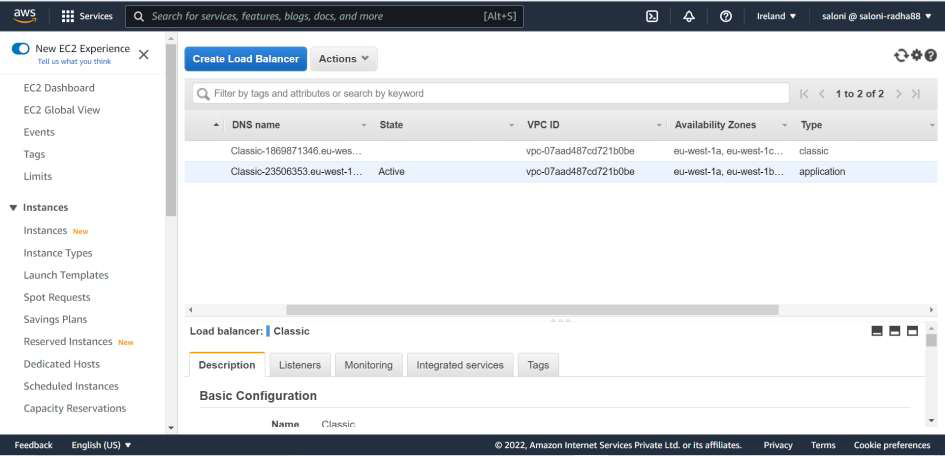
8. Go to load balancers and click on Create Load Balancers

Create Load Balancers
9. Click on Create Classic Load Balancer

Create Classic Load Balancer
10. Give the load balancer a name and add Security group for HTTP as Anywhere and add the instances and launch the Load balancer, copy the DNS name and paste it in a new browser to check if its working

11. Our classic Load balancer is working

12. Click on Migrate Now to migrate the Classic Load Balancer to Application Load Balancer

13. Click on Launch ALB migration Wizard

14. Click on Create

15. Our Application Load Balancer is created, copy the DNS name to check if its working
16. Finally, Application Load Balancer is working as well

Application Load Balancer is working